
Welcome to TransFi-Checkout
TransFi Checkout Integration Guide
Welcome to TransFi Checkout!
This guide will walk you through everything you need to do to integrate our global checkout and start accepting payments using 250+ APMs and cryptocurrencies.
What You're Building
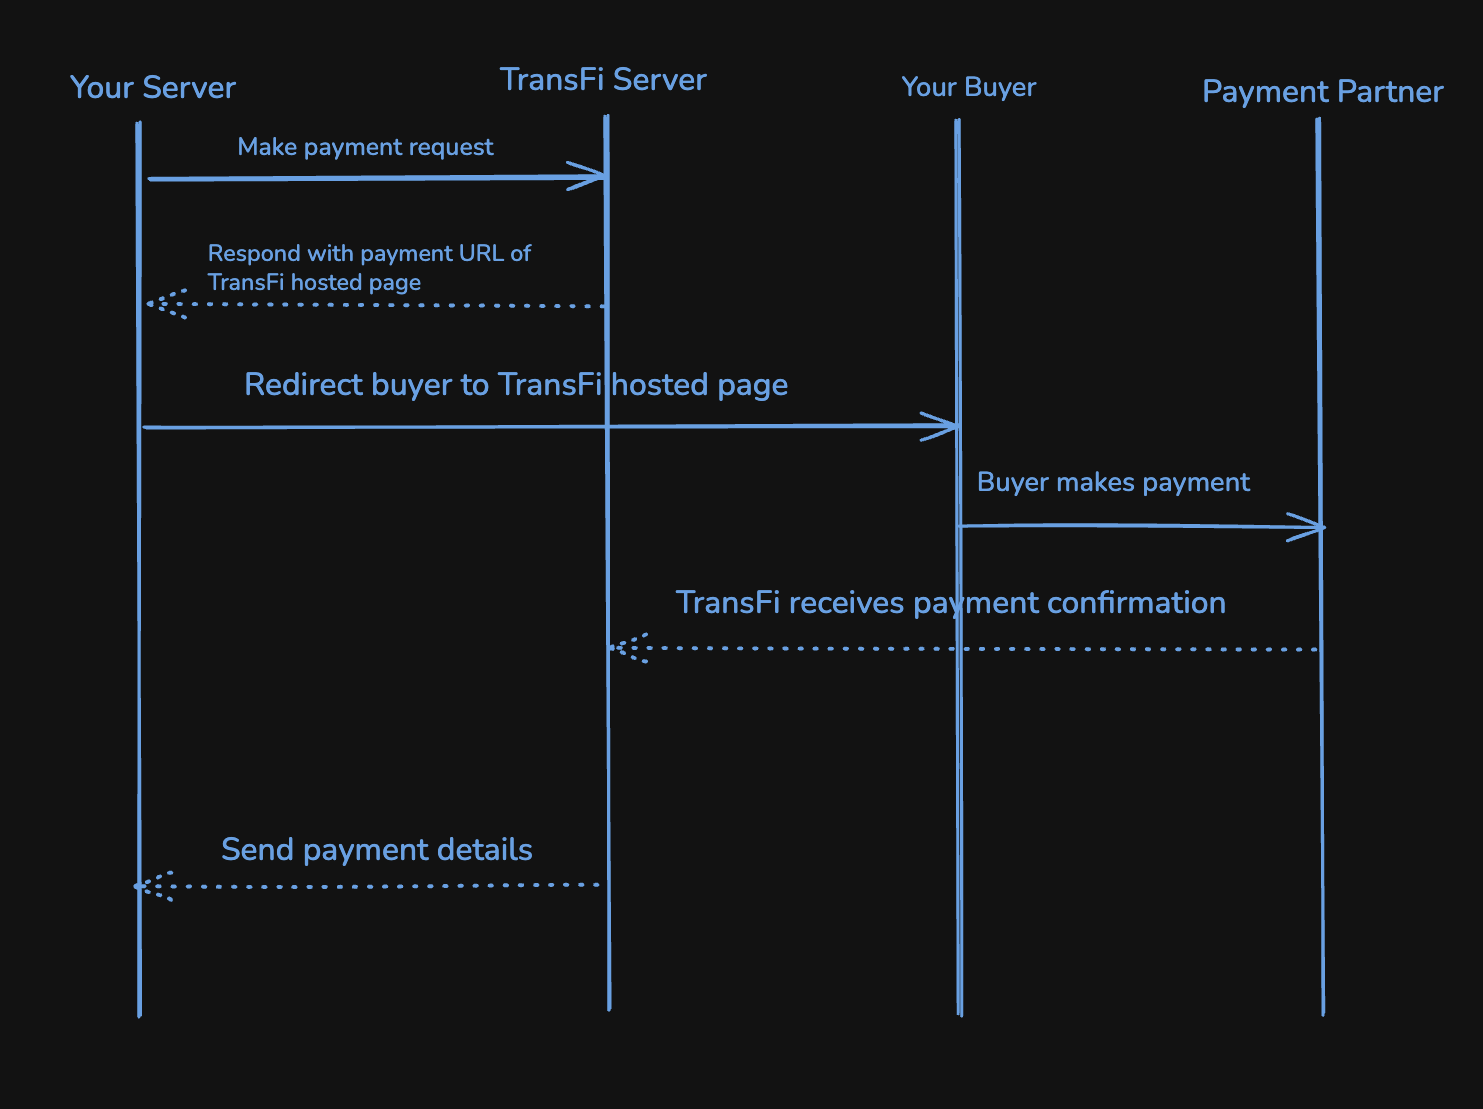
TransFi Checkout is a hosted checkout experience that lets you accept payments in just a few steps:
- You create a transaction using our API
- You receive a URL which redirects to TransFi hosted page
- You redirect your customer to the TransFi hosted page which has Checkout Widget
- Your customer completes the payment
- You track the payment via webhooks, redirects, or on dashboard
Environments Overview
You get access to Sandbox immediately after signing up. The Sandbox environment completely mimics the Production environment so that you can test the entire experience before making the changes in your live system.
Sandbox
- Used for testing and integration
- No real money involved
- Same checkout experience as Production
Production
- Used for real payments
- Enabled only after KYB approval
- Uses real fiat and crypto
[!TIP] The API URLs are the same for Sandbox and Production. Only the API keys change.
High-Level Integration Flow
Here's the complete flow you'll implement:
- Create a transaction
- Receive a redirection URL
- Redirect the user to the Checkout Widget
- User completes payment
- Payment status updates
- Webhook is sent (recommended)
- User is redirected back to your website
Initial Setup: Make Your Account Live
Before you dive into the integration, we recommend starting your account verification process:
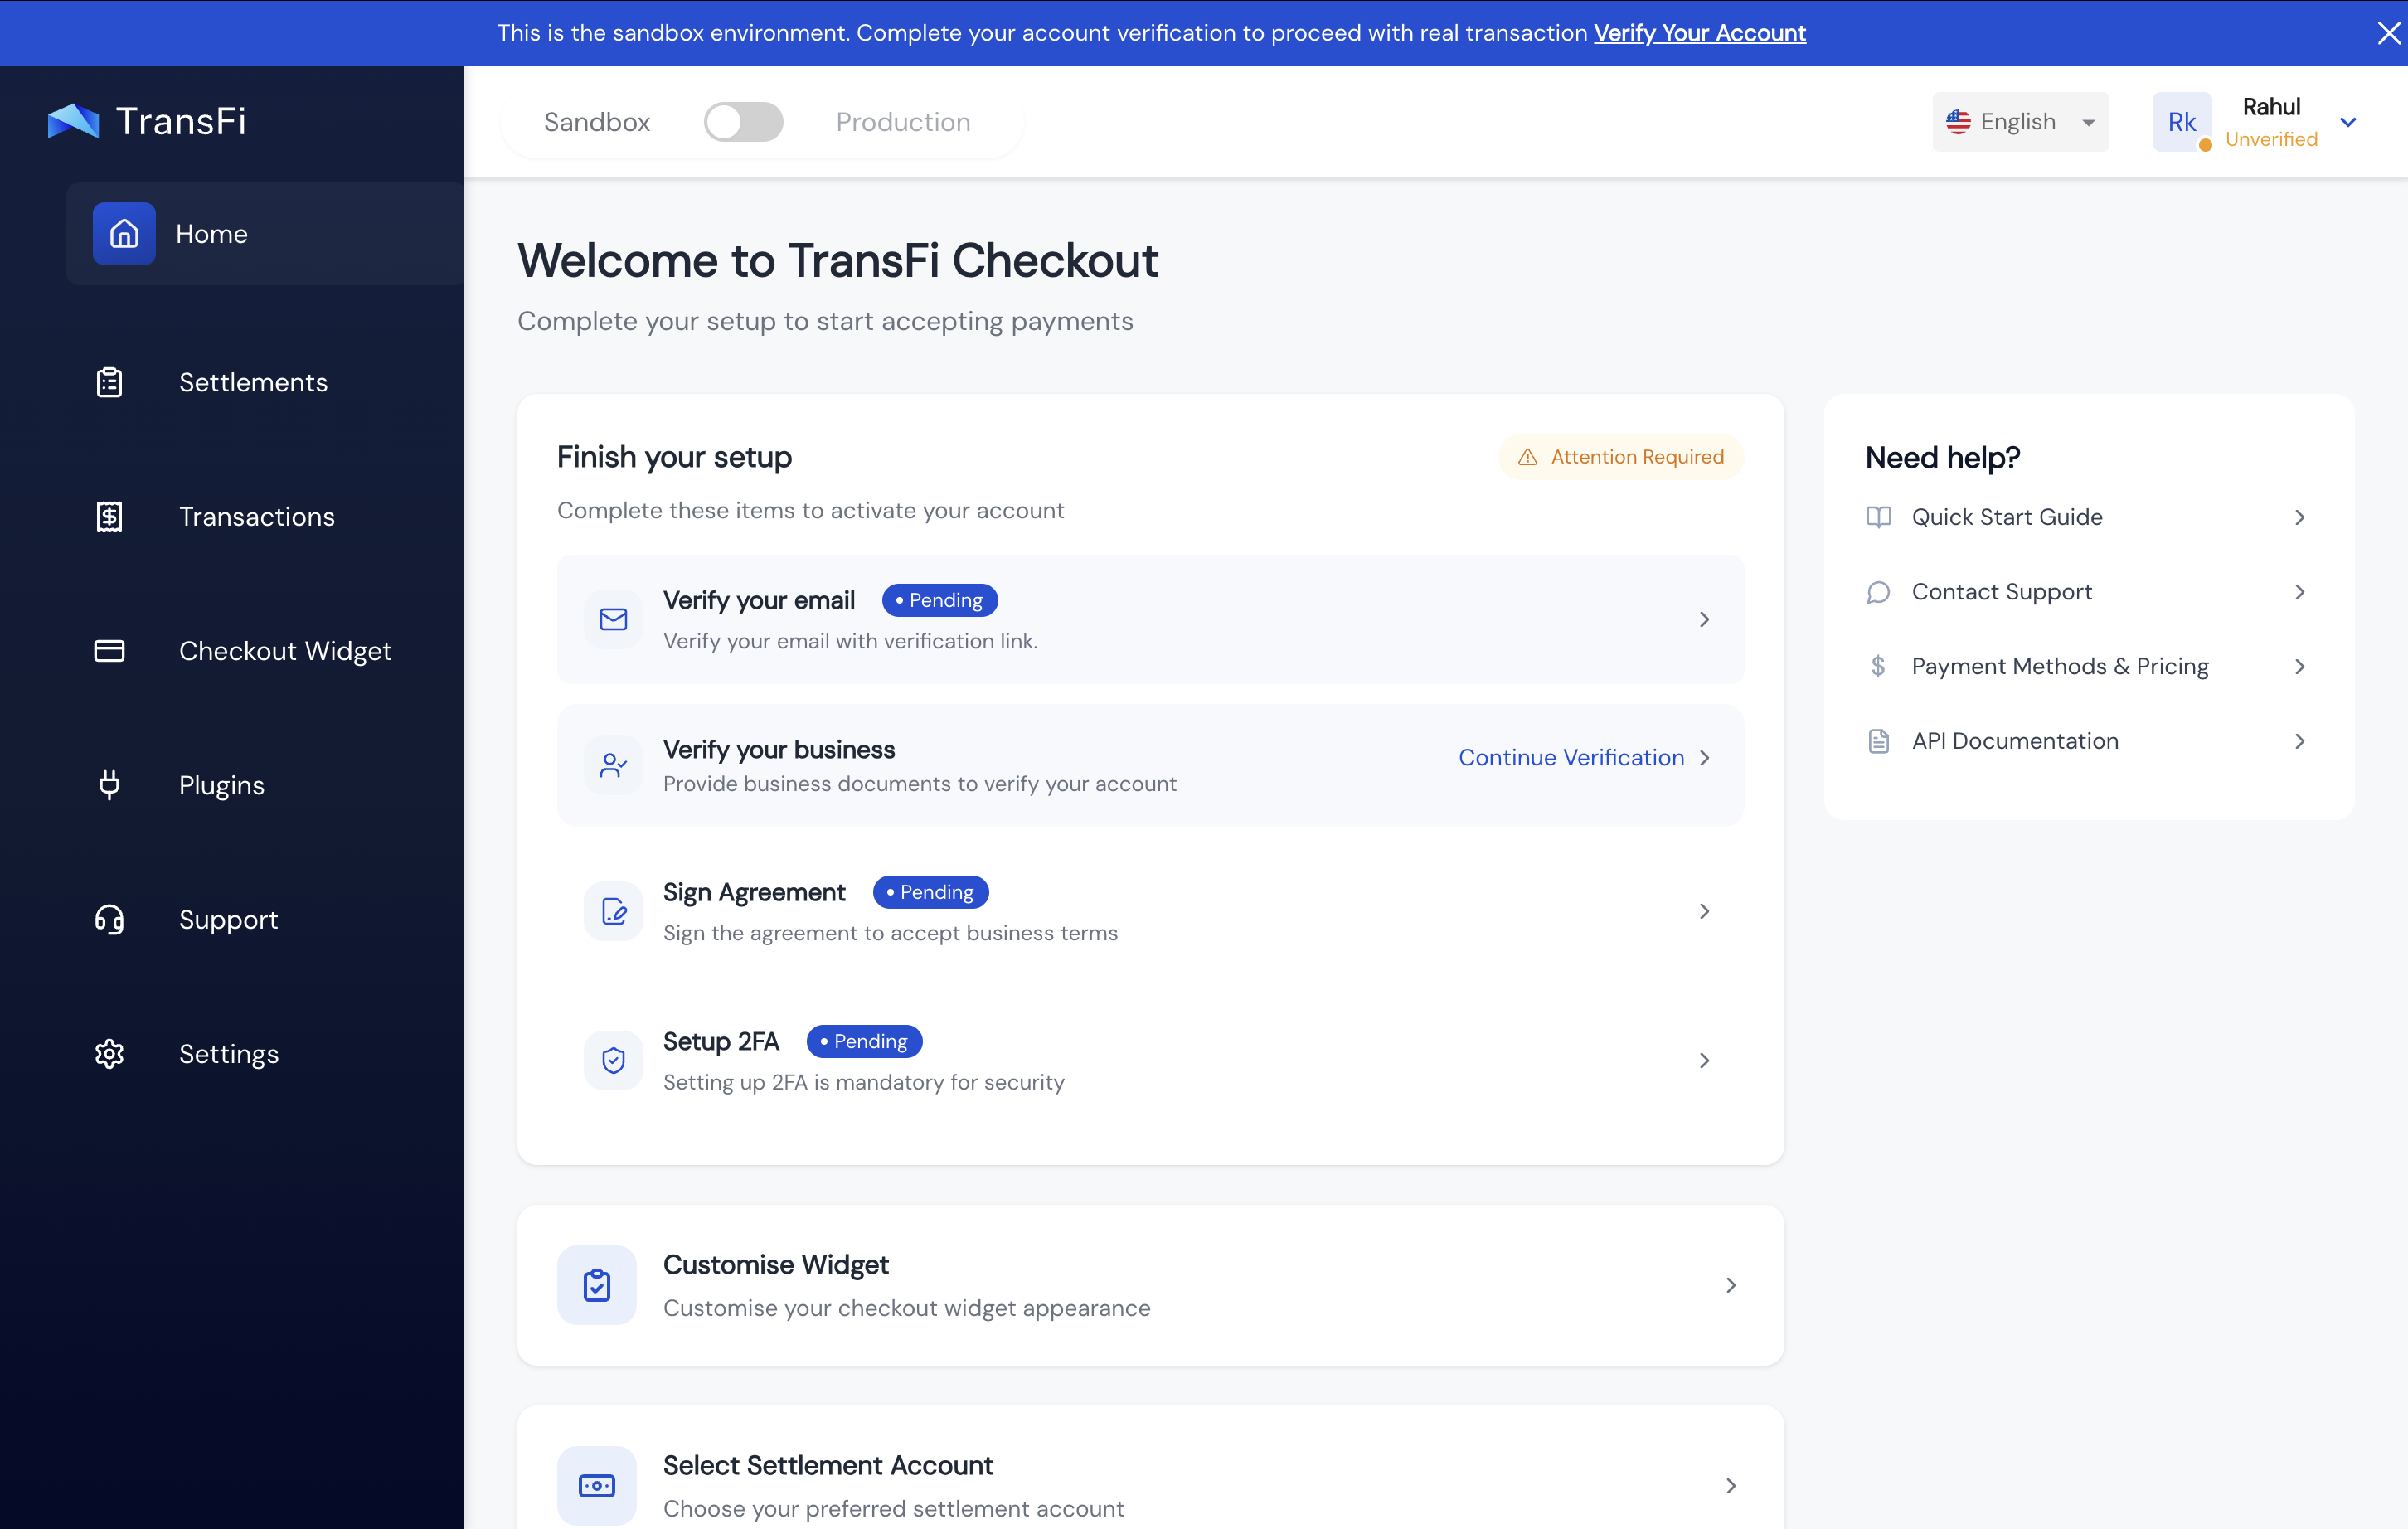
- Verify your email: Click the verification link you received in your email inbox.
- Complete KYB: Click on the business verification section in your dashboard, and fill in the required business details.
- Approval: Your account will typically go live within 24 hours of submitting your KYB documents.
- Secure your account: Please make sure to set up 2FA (Two-Factor Authentication) to secure your account. This is mandatory to access your API Secret Key in the Production environment.
Step 1: Set Up the Checkout Widget
Before creating transactions, you need to configure your Checkout Widget.
Where to Do This?
Dashboard → Checkout Widget
What Is a Checkout Widget?
A Checkout Widget defines:
- Your branding
- Supported currencies
- Supported Payment Methods for those currencies
- Supported crypto tokens
You can create multiple widget templates and reuse them across transactions. Each widget has a unique ID called the paymentLinkId.
Your customers will see this widget in the TransFi hosted page while making their payment.
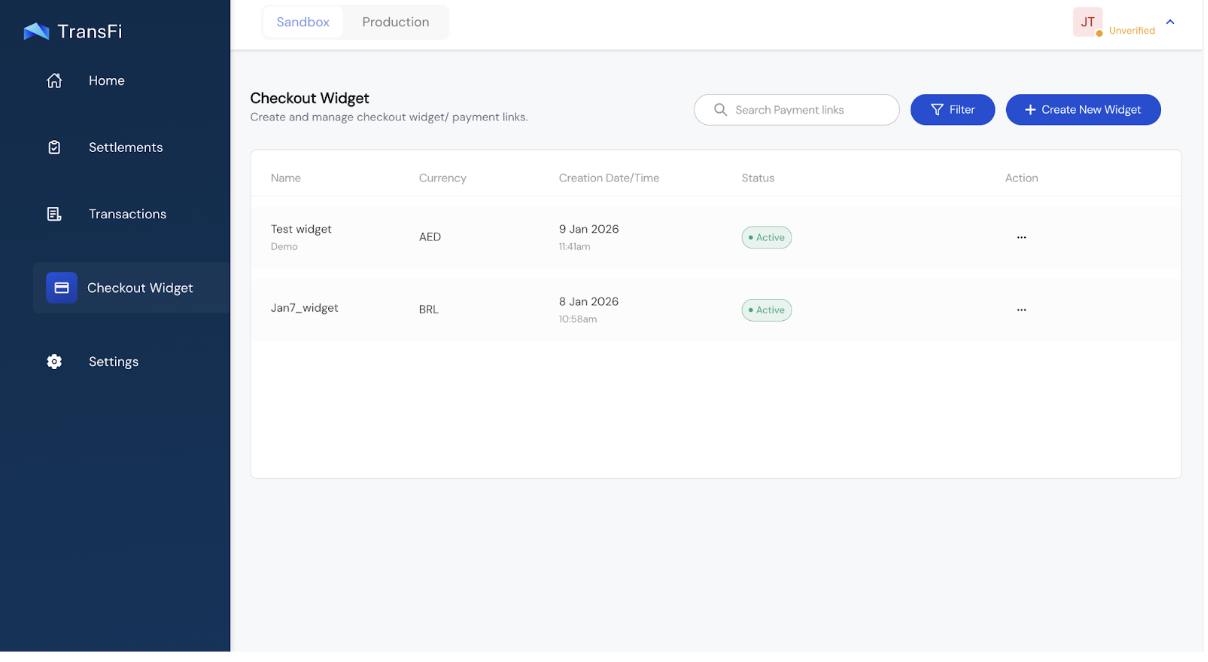
How to Create/Update Checkout Widget?
Create:
- Dashboard → Checkout Widget → Click on "Create New Widget"
Update:
- Dashboard → Checkout Widget → Click on the existing widget
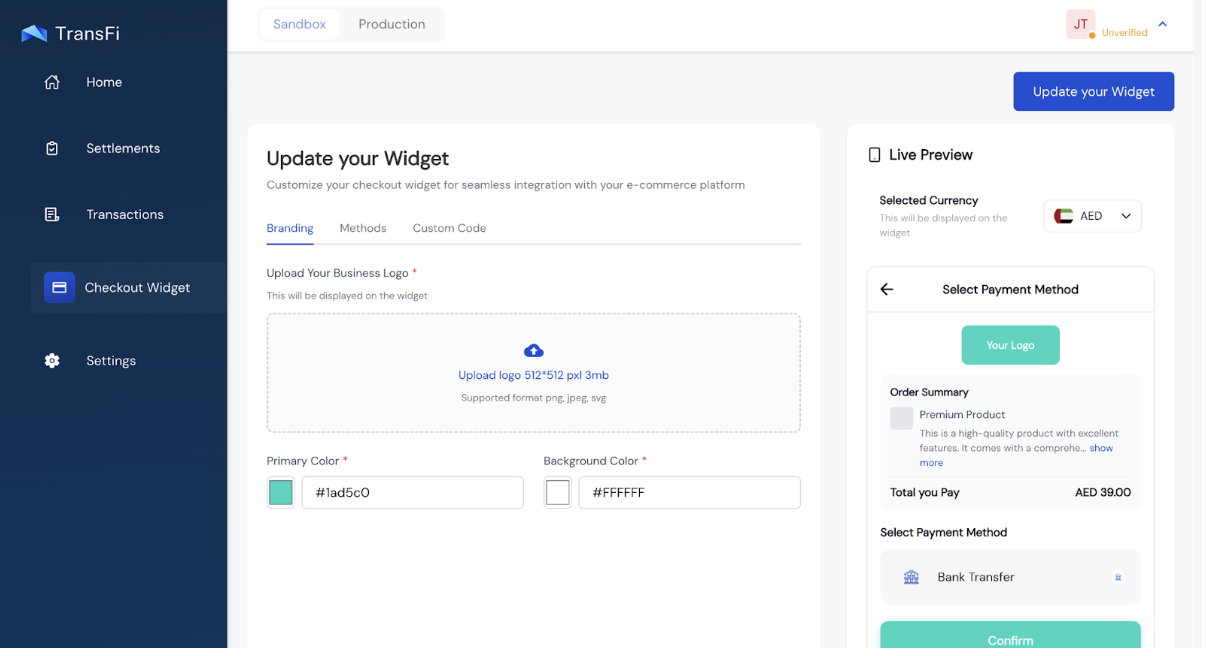
Widget Customization Options
You can customize:
- Logo
- Brand color
- Supported fiat currencies
- Payment Methods per currency
- Supported crypto tokens
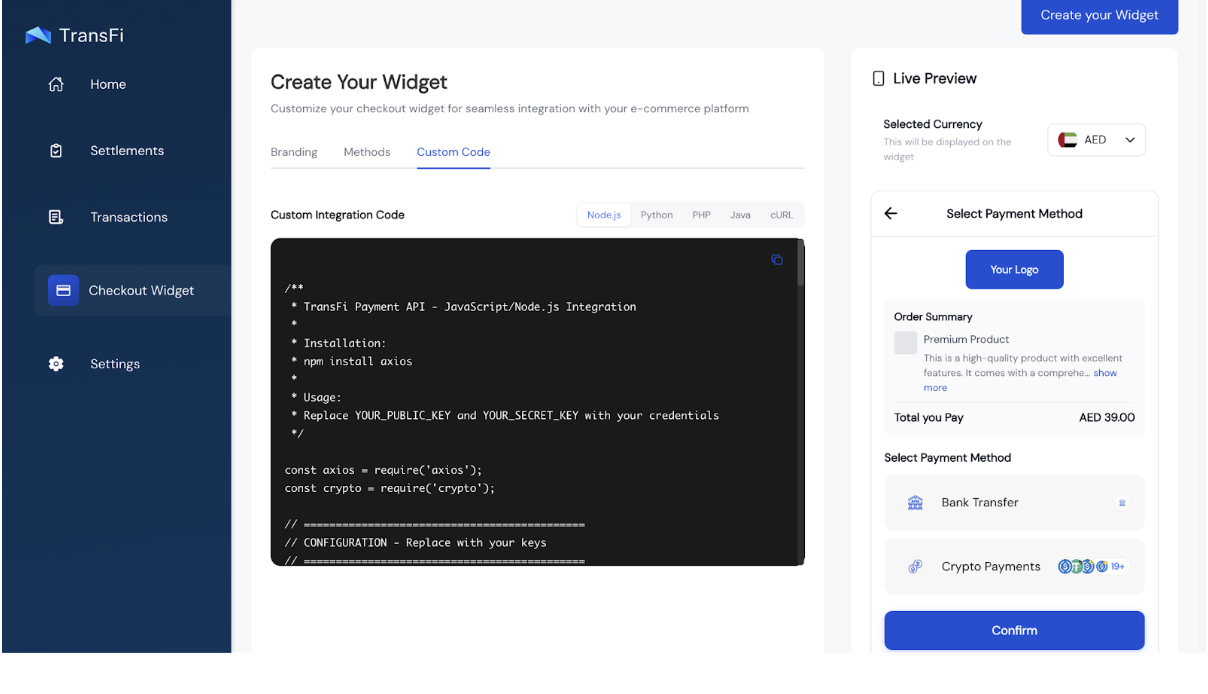
You will get a Live preview of the widget on your screen while you are making the customizations.
After adding your brand's colours and logo you can select the payment methods that you want to enable for your customers.
[!TIP] You do not need to create a different widget for each currency. You can add all the currencies and crypto tokens that you want to collect in a single widget template. To collect the payment in a particular currency, simply pass that currency in the "currency" param of the API.
You will also get custom code for the template that you created in Node.js, Python, PHP, Java and a sample cURL which you can import in Postman.
[!TIP] You do not need a new widget for every transaction. Create once, reuse everywhere. You will simply need to pass the
paymentLinkIdof that widget in the API.
Important Widget Rules
- Only payment methods enabled in the widget will appear in checkout
- If you pass a currency in the API but haven't enabled payment methods for it in the widget, nothing will be shown
[!WARNING] Common mistake: Passing a currency in the API but forgetting to enable its payment methods in the widget.
Step 2: Add Settlement Account
Before you create any transaction (in Sandbox or Production) you will need to add a settlement account. This has to be added only once and the settlement details will be stored. In the Production environment, the transactions made by your users will be settled in this account.
Where to Do This?
Dashboard → Settlements
How to Add Settlement Account?
In the Settlements tab you will be prompted to add either a Traditional bank account for settlement or a Crypto Wallet. You can choose one of these options and enter the details required for the setup and your settlement account will be saved.
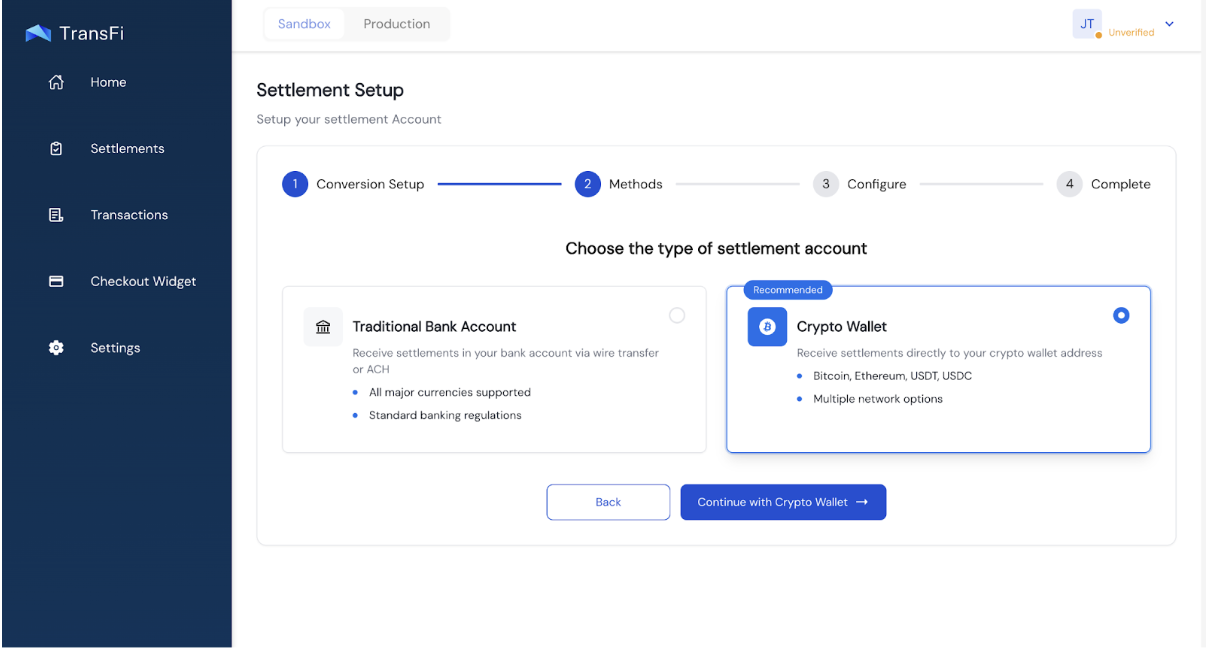
[!TIP] In the Sandbox environment you can choose to add a dummy account. However, in the Production environment you need to add the correct account where you want to receive the settlements for your transactions.
Step 3: Create a Transaction
A transaction represents a payment attempt. You can create a transaction by hitting the TransFi Checkout API.
When you create a transaction:
- You hit the TransFi Checkout API and provide the transaction details
- You receive a redirection URL in response
- This link opens the TransFi hosted page which has the Checkout Widget
You can check the API details here: Create Payment Invoice API
The optional details of the individual object are needed by TransFi for creating a transaction. If you pass these details, the user won't be asked again in checkout. Otherwise, the user will first need to fill in these information on the TransFi hosted page.
[!TIP] Pre-filling customer details improves conversion and speeds up checkout.
Where to Get the API Keys?
In both Sandbox and Production, you will get the API keys in the Settings page. For the TransFi Checkout API you will need a Public key and a Secret key. You can get these from:
Dashboard → Settings
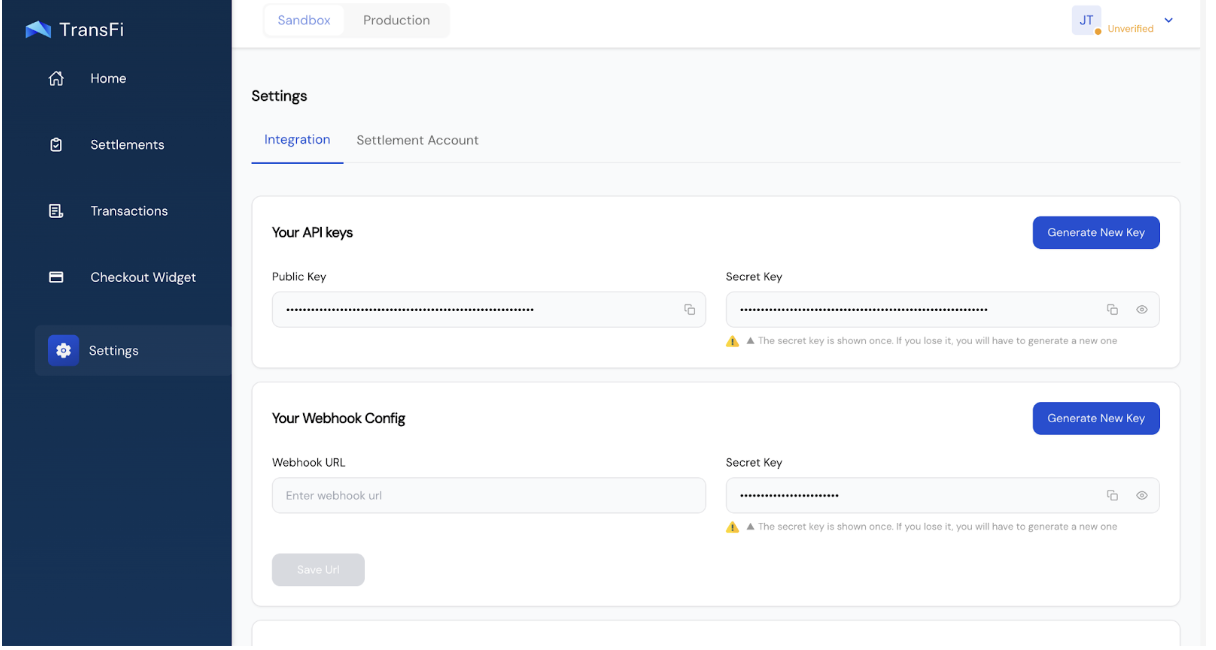
[!NOTE] To generate the keys, you will need to authenticate with 2FA that you used while logging in to the dashboard.
Step 4: Redirect to Checkout
Once you receive the payment link, redirect your customer to it.
Supported Behaviors
- Open in the same tab
- Open in a new tab
- Works on desktop and mobile
- Mobile deep-linking supported
- The checkout is fully hosted by TransFi
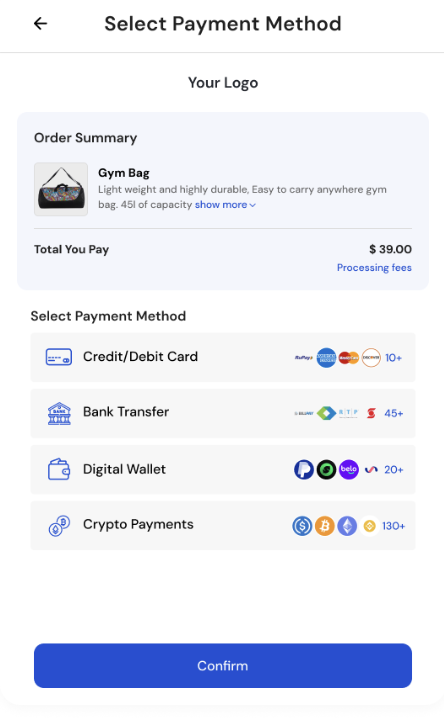
What the End User Sees
- Customer details (if not already provided)
- Payment method selection (APMs + crypto)
- Payment completion
- Confirmation
Payment methods shown depend on:
- Currency passed in the transaction
- Widget configuration
Step 5: Handle Payment Status
Payments move through the following states:
- Initiated
- Pending
- Success
- Failed
- Expired
You can track status using:
- Webhooks (recommended)
- Redirect URLs
- Dashboard
Redirect URLs
You can optionally pass:
- Success redirect URL
- Failure redirect URL
Based on the payment result, the user will be redirected accordingly.
[!TIP] Redirects are great for user experience, but webhooks should be your source of truth.
Step 6: Set Up Webhooks (Recommended)
Webhooks are event-driven HTTP callbacks that allow TransFi to send real-time updates directly to your application whenever a specific event occurs.
Instead of continuously polling APIs for status updates, your system can subscribe to webhook events and receive notifications instantly through a configured webhook endpoint.
TransFi sends webhook events as HTTP POST requests containing a JSON payload with the latest event data.
Understand the structure of webhook payloads.
Learn how to acknowledge and process webhook requests.
View webhook authenticity and improve security.
Explore all supported webhook event types.
Step 7: Test Payments in Sandbox
Sandbox lets you simulate payments without using real funds. For creating the transactions in Sandbox you simply have to follow the steps given above and use the sandbox API keys while hitting the checkout API.
[!WARNING] Common mistake: Using incorrect API keys while making Sandbox transactions
How Sandbox Payments Work?
For the Sandbox payment experience of TransFi Checkout you will not need any dummy cards, wallet or tokens. After selecting a payment method in the widget, you'll see an option to Pass or Fail the transaction. You can select the option that you want and can test out each behavior.
On success or failure:
- Transaction status updates
- Webhook is sent
- Redirect happens (if configured)
What Success Looks Like in Sandbox
- ✅ Status updated in dashboard
- ✅ Webhook received
- ✅ Redirect triggered
[!WARNING] Common mistakes:
- Missing redirect URLs
- Unsupported currency
- Widget not configured correctly
Step 8: Go Live in Production
Enable Production Access
To go live:
- Submit KYB documents in the dashboard
- Documents are reviewed and verified
- Production access is enabled
Typical approval time: 3–4 business days
After your KYB is approved, you can toggle to the Production environment in the dashboard and get access to all the tabs.
The checkout widget templates that you had created in the Sandbox environment will be available in the Production environment also. However, you will need to add the currencies and the crypto tokens for those in the Production environment.
You will need to add the settlement account details and generate the Production API keys for making transactions in Production.
[!WARNING] Common mistakes:
- Not Adding Settlement Account in Production
- Not generating the API keys in Production
- Not Adding the Webhook URL in Production
What Changes in Production?
- New API keys
- Real fiat and crypto
- New Webhook Secret Key
- New Webhook URL
You can find API keys here:
Dashboard → Settings
Final Production Checklist
Before going live, make sure:
- KYB completed and approved
- Settlement account added
- Checkout Widget configured
- Production API keys generated
- Webhook endpoint live
- Successful Sandbox test completed
Where to Monitor Everything
You can manage and monitor activity from the dashboard:
| Section | Purpose |
|---|---|
| Home | Overview |
| Transactions | View transaction details and their status and download the data |
| Checkout Widget | Branding & payment methods |
| Settings | API keys & webhooks |
| Environment Toggle | Switch between Sandbox and Production |
You're Ready! 🎉
That's it!
You now know how to integrate TransFi Checkout, test payments, and go live with confidence.
If you need:
- API reference
- Webhook payload details
- Advanced use cases
Check the related documentation or reach out to our support team.
Happy building! 🚀